How To Get Silver Hair At Home
If you were wondering how to dye your hair silver or grey at home, you've come to the right place!
Silver grey hair had been a goal of mine for a little while, and after much experimenting and finally achieving the look I wanted, I thought I'd throw together this little guide for those of you that are interested in doing the same thing.

Disclaimer: I am not a hair stylist or professional. This guide is used for reference only and contains steps and products I've used to achieve silver hair without a salon.
Before you begin…
I've never had to do as much up-keep on my hair as I do now that it is silver.
It's important to know ahead of time that silver hair is a pretty demanding hair colour, so make sure you're ready to take on the responsibility before moving forward!
If you've never dyed or bleached your own hair before, I recommend getting this done at a salon so you can be sure that it's done properly with minimal damage.
You can even take notes and ask questions if it's something that you'd like to attempt in the future. If you're ready to take the plunge and do it on your own, keep reading.

Bleach, bleach, bleach!
Unless you were born as a natural level 10 shade, you simply can't achieve this colour without bleaching your hair.
The silver hair colour simply won't take, so starting with super light hair is the first step in achieving this grey hair shade.
Take a look at this chart below to determine your current hair colour level:
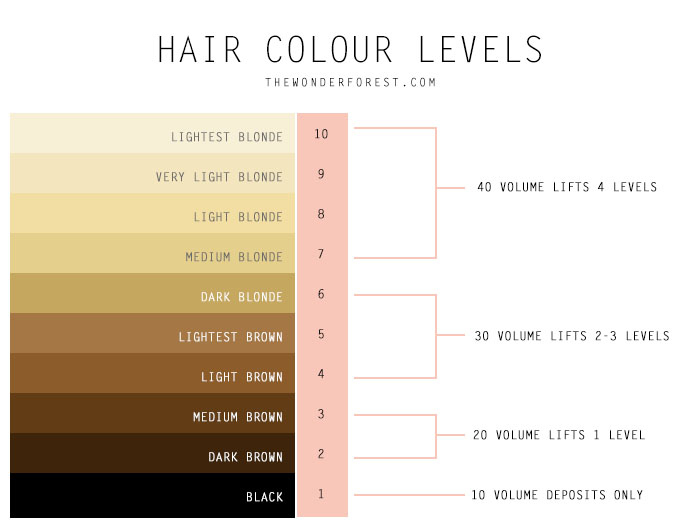
Depending on your natural colour, you may have to do the lightening process multiple times. For a complete technical guide on how bleaching works and how I bleach my own hair, check out this post.
This process shouldn't be taken lightly. You can seriously damage your hair or cause bleach burns on your scalp if you mess up or don't do proper research first.
Hopefully my guide to bleaching your hair at home will help you through that.
Go and read it then come back here. Got it? Good, let's continue!
It's important that your hair reaches the lightest possible level before attempting to go silver. Your hair should should resemble that of the inside of a banana peel.
Be aware here that you're going to be stripping down the colour of your existing hair, which can leave it brittle.
This post contains affiliate links for product recommendations. Any purchases made through these links help support the blog with a small commission. As an Amazon Associate I earn from qualifying purchases.
I suggest stocking up on some deep conditioning treatments, Olaplex, or leave in conditioners to aid in the repairing process and to leave your hair shiny instead of dull and dry.

Tone it, baby!
After your hair is lightened, it might look quite yellow and unattractive. If it's leaning more on the orange side, it's not yet light enough.
The toning process is what will kill those yellow hues and killing those hues is a must for this silver/grey look.
You can use toner, dye, or both depending on your taste. Let's talk about toner first.
You'll want to go with a purple or violet based toner, like the Wella T18 Lightest Ash Blonde toner. I always use this stuff with a 5 or 10 volume developer instead of the 20 they recommend on the bottle, simply to save my hair from even further damage.
With a 5 of 10 volume, it's not going to lift the colour any more, but instead just deposit the colour/toner onto your hair.
You will apply it using the bowl/brush technique and following the instructions that come with it. Information about this can be found in my guide to bleach lightening.
Leaving this on your head for about 20-30 minutes will do the trick. Keep checking your hair throughout the process.
Another option, although not as permanent, is to try a semi-permanent DIY toner which will not cause any damage to your hair as it doesn't need a developer, but note that it doesn't have the same staying power.
That's usually all there is to it and toning your hair may just get you to the grey shade that you wanted without additional dye, but if you want something darker or more vibrant, a silver/grey coloured dye is the way to go instead of a toner.
Note that if you used my DIY toner tutorial, it acts as a semi-permanent dye and you don't need to do anything else!

Prepare to Dye!
Alright, so as I said above, sometimes you don't need to add additional dye after bleaching and toning your hair. You can make this judgement for yourself based on your results.
I've had toning results that didn't exactly get me as silver as I would have liked, so added a semi-permanent dye on top.
You can even skip toning entirely and move directly towards a violet based dye.
I've tried a couple of direct silver dyes, and the best one so far has been the Pravana Chromasilk Vivids in Silver. It is a longer lasting semi-permanent colour which requires no developer, which means no damage to your hair as there is no peroxide.
You will apply this directly from the tube with a brush and bowl just like the bleaching process.
There are a couple of ways you can do this depending on the shade of grey you want to achieve. You can empty the entire tube into your bowl and apply it as is for a darker steel grey colour, or you can dilute it (like I do) for a lighter silver colour.
To dilute it, first fill your bowl with a bunch of cheap conditioner and then apply some of the Chromasilk colour.
I added about half of a tube to 3/4 a cup of conditioner for my light silver shade. Mix it up and apply it just like you would with the brush.

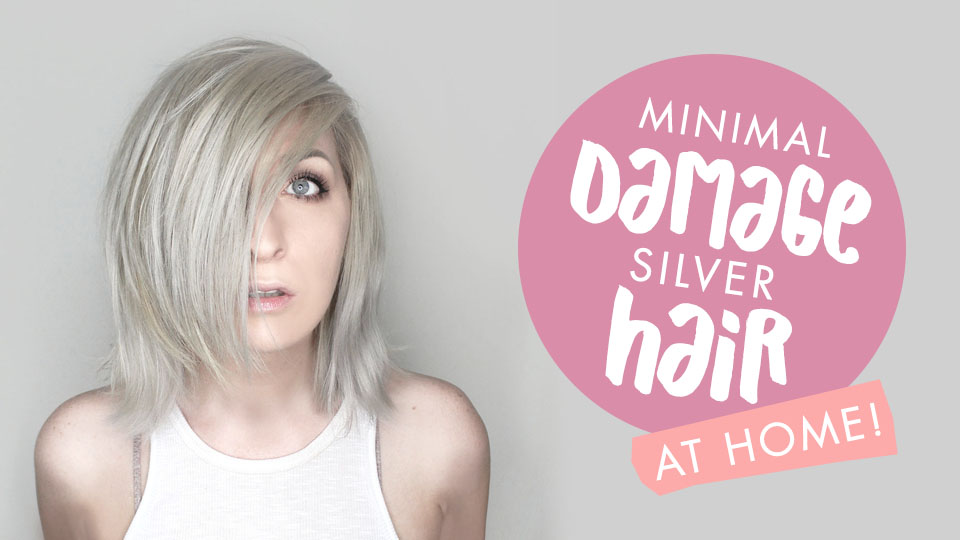
To help put things into perspective, I created a video showing you how I touch up silver hair and create my DIY silver toner. Watch it here:
Silver Hair Care Tips
Silver hair is probably one of the most difficult colours to achieve and keep. It tends to fade rather quickly, so you'll want to stock up on some products to help maintain the shade.
One of my favourite tricks is to use this Roux Fanci-Full Rinse in Silver Lining in between dye jobs. It is a temporary hair colour rinse that you apply to damp hair and it lasts until you shampoo it out.
If you've trained your hair to only need a washing every few days, this is a great product for a little 'pick-me-up'!
Shampoo your hair every few washes with a purple based colour correcting shampoo like Shimmer Lights by Clairol or if you're in Canada, the Ice Cream purple shampoo you can get at Shopper's Drug Mart is AMAZING.
This will help to keep the yellow tones at bay while your colour fades. If they start creeping up on you, try my at home DIY toner.
To keep your hair looking healthy, use a deep conditioning treatment once a week. Remember, the less you wash your hair, the longer the colour will last.
Tackle those roots! You don't want to let your roots grow more than a centimetre because you will be causing more hassle for yourself.
It's much easier to bleach regrowth that is this length because the risks of unwanted banding (seeing a line where the new bleach/old bleach begins) is lessened. When you are ready for a re-dye, just concentrate the products on the roots and not on your pre-lightened/dyed hair.
If you're using a normal shampoo, grab one without sulfates as they will strip the colour out slowly. Most shampoos "for coloured hair" should work, but keep in mind that it WILL still fade regardless of the shampoo you use.
Come see more on Instagram: @wonderforest
Recommended Products:
Last Updated on
How To Get Silver Hair At Home
Source: https://www.thewonderforest.com/silver-grey-hair-dye-at-home/
Posted by: decarloelows1972.blogspot.com

0 Response to "How To Get Silver Hair At Home"
Post a Comment